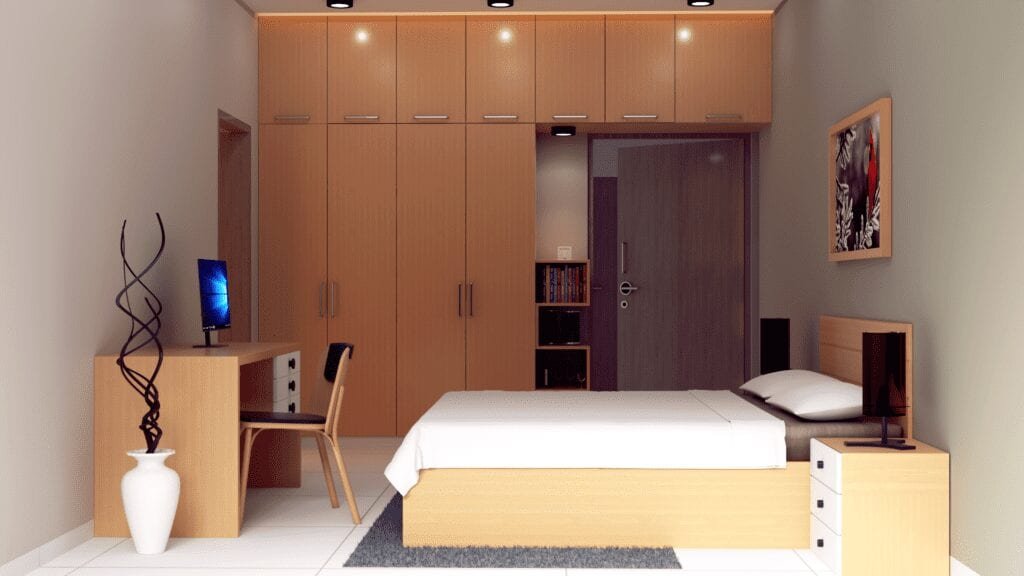
Transforming Student Renders. This was an Image sent by one of our students of the “The Complete Sketchup & Vray Course for Interior Design”

The student has done a great job in terms of lighting, materials & also has to be lauded for the way he sent us the Sketchup file.
He packaged all the Vray materials along with the Sketchup file into one folder which is the right way to share your .Skp file with other computers.
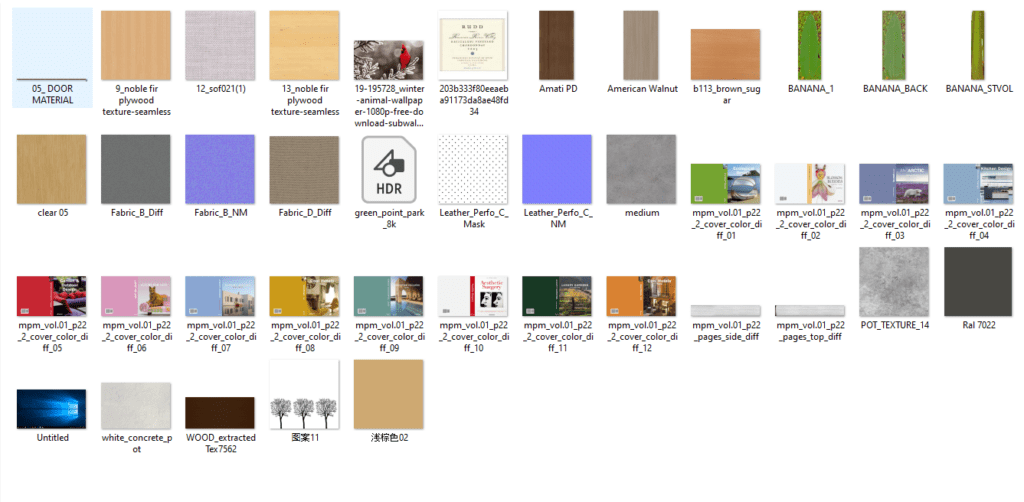

Check out our blog on how to structure & share Sketchup Files along with Vray materials (Coming Soon)
Transforming Student Renders
Now let’s get to how we could improve his image even further
Here’s what we found
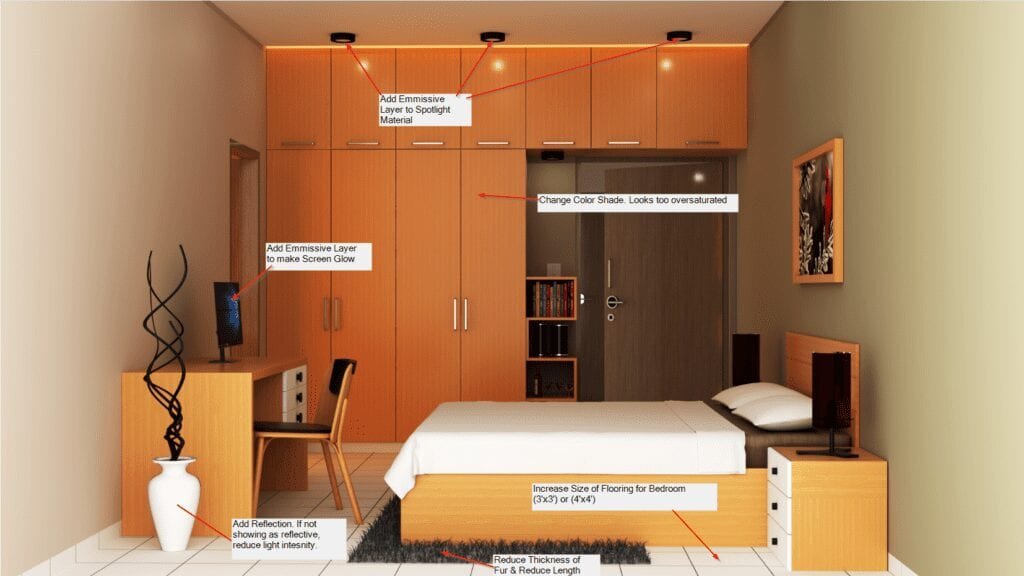
1) Adding Emmissive Layers to Your Screens & Downlight
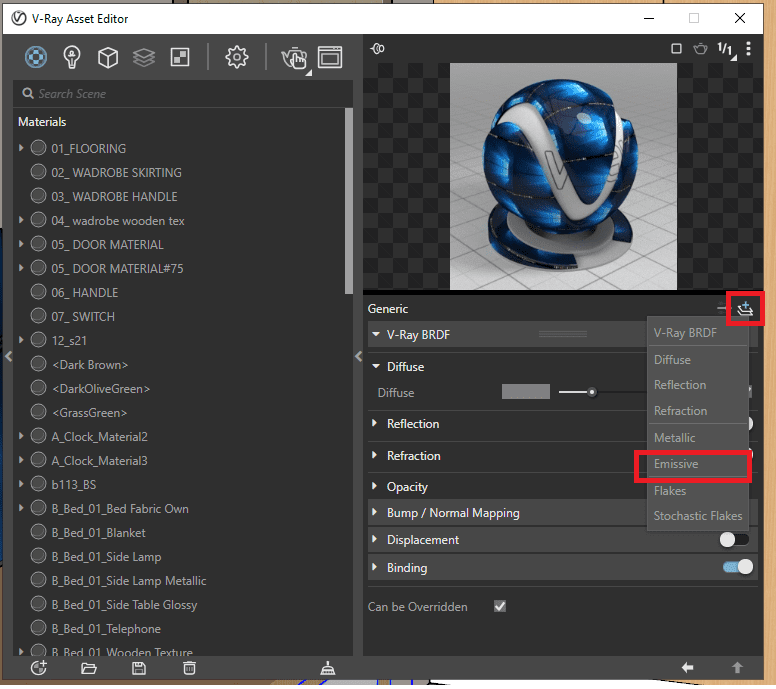
Always remember to add extra glow to your scene by adding an Emmissive Layer or by creating a new material.
Step 1 : Add an Emmissive Layer

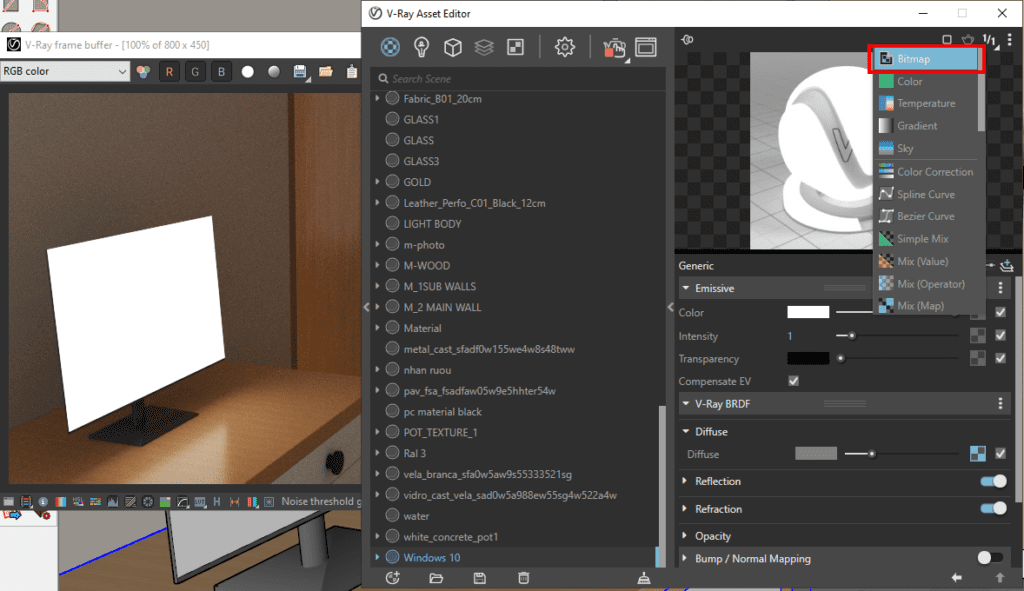
Step 2 : Add a Bitmap to the Emmissive Layer Color

Step 3 : Adjust the Texture position
- Right clicking on the Face
- Select Texture > Position
- Adjust the position of the Texture accordingly using only the Green Pin
- Right Click > Done
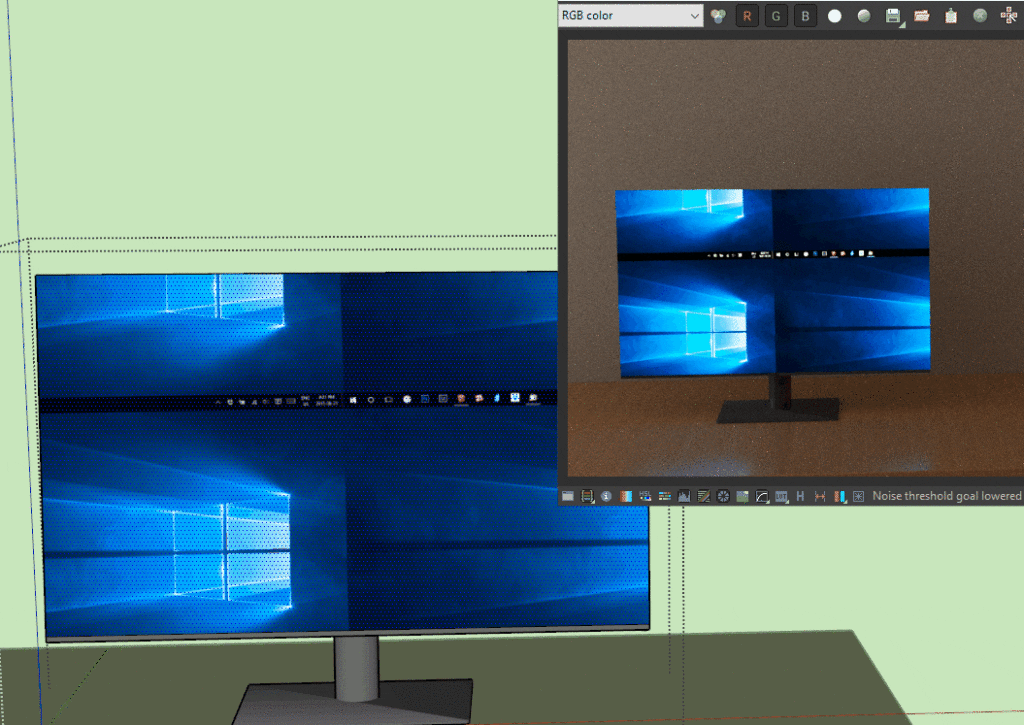


This looks much better than a dead screen with no brightness.
There wasn’t any material applied to the downlight, so in this case you can create a New Emmissive Material.
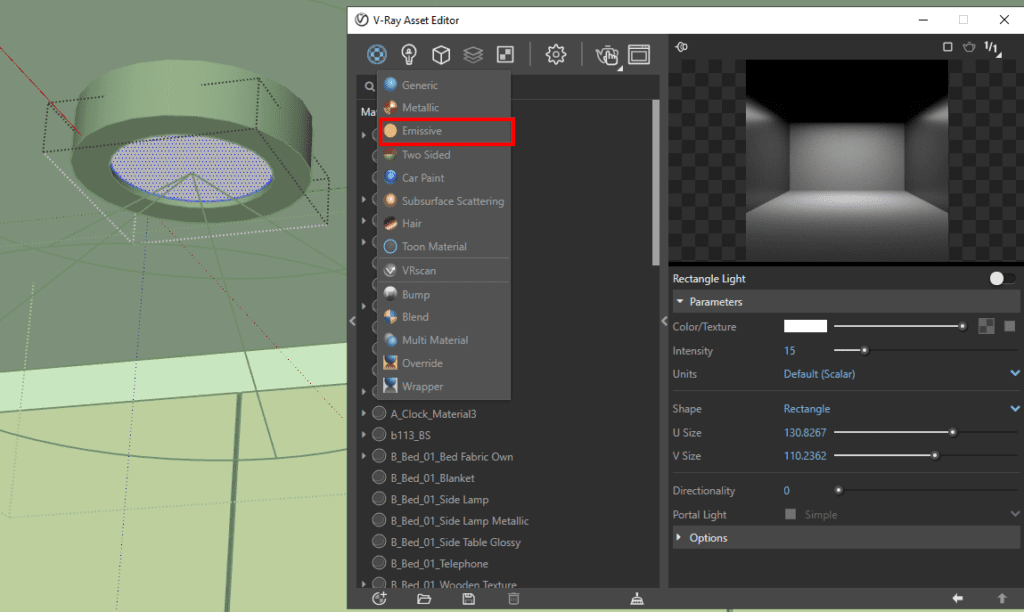
Apply the material using the Bucket tool.

2) Change the Lighting in the Scene
In this sketchup file, you will find that the student has placed a camera behind the scene and used that as the primary light. Although it gives ample lighting to the scene, it doesn’t give you the ambience.
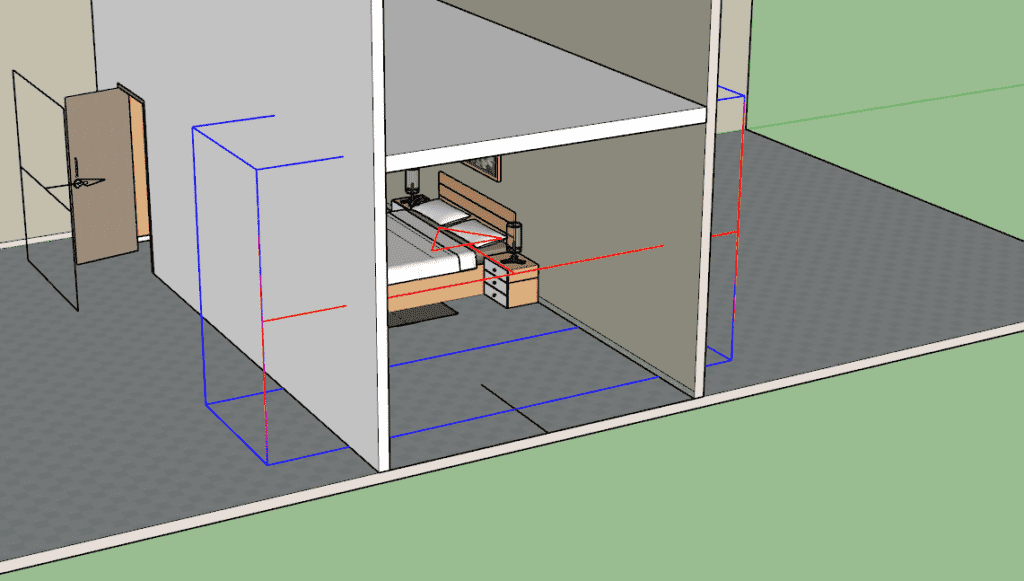


The golden setting to get this good lighting into your scene is right below

Change Color Mode to Override
Change Size multiplier to 100
Also make sure your shadow angle is set correctly as per the north direction. (The North Direction in Sketchup is always pointed towards the Green Axis)
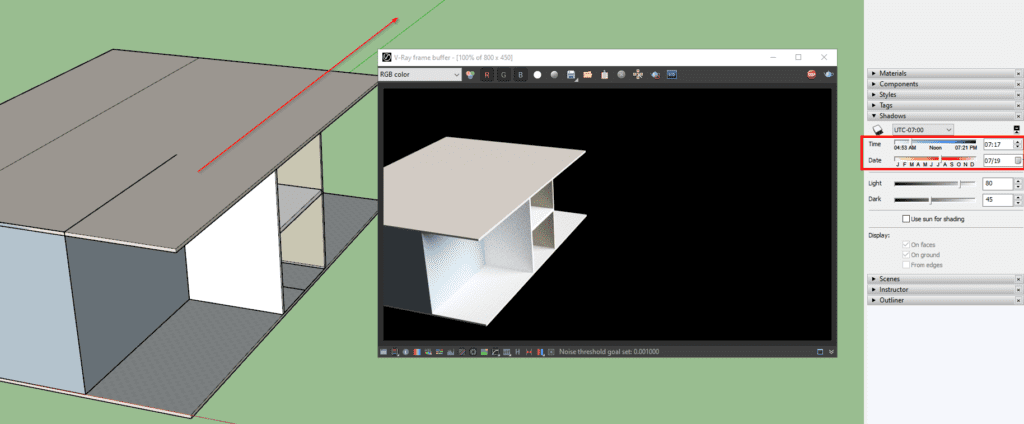
Our progress so far

3) Change the Flooring Size
Select the material using the image sample in the Default Tray. Edit the size of the material in the Materials section of the Default Tray.
Edit the size of the grout by adjusting the size in the Vray Asset Editor.

4) Reduce the size of the Fur

5) Post Production in Vray

Adjust the exposure, White Balance, Color Balance & Levels in subtle amount to add that extra pop to your image.
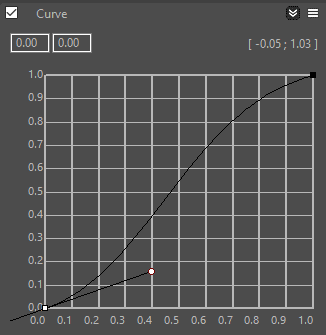
Finally add an S-Curve in your Curve window to highlight the shadows & highlights.
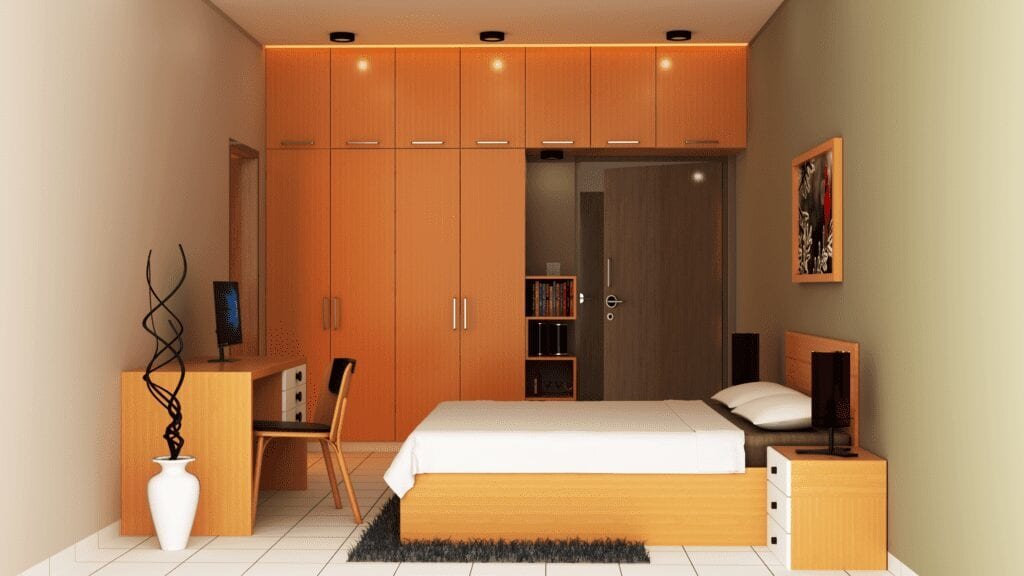
Here is the Before & After
The Archgyan Podcast is sponsored by our Courses. Sign Up Now to start your Architecture & Interior Design Journey.

